Tuesday, June 25, 2013

Strawberry-Basil and Peach-Ginger Popsicles


Despite Seattle's meteorological mood swings (from sunny heat to chilly rain, sometimes all in the same day), summer is here. That means it's popsicle season. Before you point it out to me, I know this isn't really "cooking," but these are easy and delicious, perfect for a summer day. Besides, "What's Jim Freezing?" is not nearly as catchy a blog title.

I love making popsicles at home. It's really easy, and you know what you're eating. I have fond childhood memories of Otter Pops, but when I tried one last summer it wasn't the same. The neon colors and sickly sweet, corn-syrupy flavor? It'd be nice to have a fruit-flavored treat that actually had some fruit in it. We can do better.

The other upside to making your own is that you can combine just about any flavors you want. Sweet, savory or a mix of the two. The world is your oyster (let's not make oyster popsicles, though).
I have a feeling I'll be whipping up all kinds of popsicles this summer, but I wanted to start with something basic. Peach and strawberry. The ginger and basil play well off these two and make the flavors a little more interesting and complex. Feel free to play around with them and make your own up (basil and peaches could be interesting).

If you don't already have them, I'd recommend getting some popsicle molds for this. You can buy them at just about any supermarket in the summertime, but you really can't beat the selection online. There are all sorts of shapes and sizes to choose from.

Ingredients

Strawberry:
2 cups hulled and quartered strawberries
3 tbsp evaporated cane sugar*
2 tsp lemon juice
2 tbsp of chopped basil
1/8 cup water (maybe more)

Peach:
2 cups chopped peaches (peeled or not)
3 tbsp evaporated cane sugar*
2 tsp lemon juice
a pinch of ginger
1/8 cup water (maybe more)

*I've been getting some questions about what evaporated cane sugar is, and where to find it. It's basically just unrefined sugar. It's a little more crystal-like and has a light amber color. You can sometimes find it in bags on the shelf near the regular sugar, but the stuff I use is in the bulk section of the supermarket, next to the flours and oats and stuff. It's usually around $1.50 a pound. I took us off the processed sugar about a year ago, so that's why it appears in my recipes instead of plain old sugar. Of course, you can use the plain old sugar if you don't have any of the cane sugar. It's a 1-1 swap for the processed stuff, so the substitution is really easy.

Put everything in the blender and process until smooth. You may need a little more water, depending on the consistency you want, but I found 1/8 cup to be just right. Here's a view down into my blender:


Pour the mixture into popsicle molds and put the caps on tight. Put them into the freezer and freeze for at least 8 hours.


If you don't have popsicle molds, just pour the mixture into paper cups and put them into the freezer. After an hour, they'll be frozen enough to allow a stick to stand upright. Put the stick in and let it freeze as normal.

To unmold, run the molds under some cool water and jiggle the handle a bit. The popsicles will slide right out. Lick 'til your heart's content!

Sunday, June 16, 2013

Sweet Potato Empanadas with Braised Collard Greens


I realize that posting this recipe now makes no real sense. I've just been raving about summer and how much I love it and now I'm posting a recipe that has a bit of a fall feel to it. Sweet potatoes, walnuts and apples? I might as well serve up hot cider and carve pumpkins, too. My only saving grace is the fact that sweet potatoes are becoming a year-round thing in the market, which is good, because they're hard not to love. Plus, they pack in loads more nutrition and vitamins than conventional potatoes.

The truth is, I couldn't have waited to make this even if I'd wanted to. Ever since the last time I made it, I've been thinking about it. I love just about anything baked in dough, but the spicy sweetness of this filling is a really good contrast to the earthy, slightly salty crust. The collard greens are in line with my basic kitchen philosophy on greens: simpler is better.

This recipe uses masa harina, which is a flour made from nixtamal, corn meal that has been leached in lye and then dried and ground. It's got a delicious, unique and penetrating flavor. Even the smallest amount can enhance a dish. It's a staple ingredient for tamale recipes and I like to put it in my onion ring flour to give them an extra crunch. You should be able to find it in a well-stocked grocery store or Latin food store. My go-to brand for any specialty flour is Bob's Red Mill. I like to support them because they treat their employees really well.

You can soften up your sweet potatoes a couple of different ways. You can bake them, though that may run about an hour, depending on their size. I didn't have that kind of time, so I washed them, wrapped them in a paper towel and microwaved them for about 9 minutes, turning them over about halfway through. If you boil them, just throw them into a hot oven for 5 minutes or so to get rid of the excess moisture.

Ingredients

For the empanada dough:
1 1/2 cup unbleached all-purpose flour
1/2 cup masa harina
1/4 cup Earth Balance, softened
1/4 cup vegetable oil
1 1/2 tsp baking powder
1 tsp salt
1/2 cup ice water

For the empanada filling:
3 small sweet potatoes, baked or microwaved until tender
1/3 cup diced shallots
1/3 cup diced apple
1 1/2 tsp curry powder
1 tsp ground cumin
2 1/2 tbsp chopped walnuts

For the collard greens:
2 bunches of collard greens, stems trimmed, washed and chopped into 1-inch strips
1 sweet onion, diced
2 tbsp Earth Balance
2 tbsp vegetable oil
2 garlic cloves, minced
Red pepper flakes, to taste

Preheat oven to 300 degrees.

Make the collard greens: Put a Dutch oven over medium high heat and add the oil and butter. Once it's melted, add the onion and cook it until soft. Add the garlic and red pepper flakes and cook another minute until the garlic is fragrant. Add the greens and toss them until they're coated. Put the top on the pot and put it in the oven. Let it cook for an hour, stirring the collard greens 2 or 3 times while they cook. When they're done, they'll look like this:


Make the empanada dough: Combine the flour, masa, salt and baking powder in a medium bowl. Add the butter and oil and stir it all together with a wooden spoon. It should be very dry and crumbly.


Add the water and stir it until the dough comes together. Kneed it until it's smooth, then let it rest for 20 minutes.


Make the filling: Cut the softened sweet potatoes in half and scoop the flesh out into a bowl. Discard the skins. Heat a bit of oil in a small skillet over medium heat and add the shallots. Saute them until tender and then add the apple, cumin and curry and stir them around to coat. Saute until fragrant, about 4 minutes or so.


Add the shallot/apple mixture and the walnuts to the sweet potatoes and stir them around until the potatoes are mashed and everything is incorporated.


Assemble the empanadas: Cut the dough into 8 equal parts. I did this by just cutting the ball of dough into quarters and then cutting those segments in two. Using a little flour for dusting, take the balls of dough one at a time and flatten them out into a disk. You can use a rolling pin, but I just used a fist and pushed it out with my knuckles. They don't need to be perfect circles, but get as close as you can.


Spoon the filling onto the lower half of the circle, leaving 1/4 inch or so around the edge of the circle.


Fold the top over and press the edges together with the prongs of a fork. Repeat with the others and put them all on a lined baking sheet. Brush them with some melted butter. Again, they don't have to be perfect, so don't worry about making them any exact diameter or anything. After the first few, you should have a hang of it. Some will be bigger than others, which is great for a group with varying appetites. Besides, empanadas should look a little imperfect and rather rustic.


Your collard greens should be close to done by now. Once they are, take the pot out of the oven and set it aside. They will stay hot for a long time in that Dutch oven, so don't worry about them going cold.

Bump the temperature up to 400 degrees and put your empanadas in. Bake them for 20 minutes, until they're golden brown. The smell will be incredible. Plate them up with some collards and some dirty rice and enjoy.

Thursday, June 6, 2013

Creamy Summer Soup


I spoke of my love for summer in my last post, so I'll spare you this time around. Suffice it to say the weather in Seattle has been phenomenal this week and has gotten everyone in the summer frame of mind. I'm tempted to go run through the sprinkler a few times to make it official.

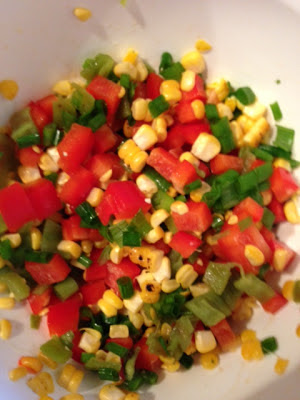
This soup is about as summery as you can get. It also pulls off a neat trick: it's creamy enough to make you swear there's some dairy in there somewhere, but there's not. This is a really fresh-tasting, back-to-basics kind of soup. Other than the broth, the ingredients are all you see here:


You'll need a grill for this, though holding the peppers over the open flame of a stove burner will do in a pinch. If your stove is electric and you have no grill, you can drizzle the peppers in a little olive oil and put them in a 350 degree oven for about 40 minutes to get the same effect. Just be sure to put them in a covered bowl or paper bag immediately after you take them out. I don't recommend doing that with the corn, so just skip charring it if you're doing things this way.

Ingredients
3 ears of sweet corn
1 red bell pepper
1 medium ripe avocado
4 green onions
1 medium Anaheim chile
1 medium Poblano chile
2 cups veggie broth
1 lime, cut into wedges

Start up your grill and let it heat up for a bit. Meanwhile, dice the red pepper and green onions and put them together into a bowl.

Grill the chiles for about 3 minutes per side, until they are blackened and blistered. Take them off the grill and put them directly into a bowl and cover it with plastic wrap. You can also put them into a paper bag and seal the opening. Leave them in there for 10 minutes.

Reduce the heat a bit on your grill. Remove the outer husks and silk from one of the ears of corn, until just the bottom husks are left (the ones wrapped directly around the corn). Grill the corn until the husks are burnt off and the corn itself is getting charred. I ended up charring mine a little more than what's shown here, but this works as well.


Remove the kernels from the other two ears of corn and put them into a blender with the flesh of the avocado, broth and a pinch of salt. Puree until smooth.

Take your chiles out of the bowl or bag. After steaming in there for a while, the skin should be very easy to peel off. I use the back edge of a knife to take the skin off. Cut the top and stem off the chiles and slice it down the middle. Remove the seeds and inner part of the stem from the chiles. Add all of the Anaheim chile and half of  the Poblano to the blender and puree some more.

Dice the unused half of the Poblano chile and add it to the bowl with the red bell pepper and green onion. Cut the kernels off the grilled cob of corn and add them to the bowl and stir it all together.


At this point, you're done. You can eat it as-is, at room temperature (which is what we did), or chill it in the fridge and have it cold later. If you're not serving it immediately, go ahead and put both into the fridge. Serve by ladling the soup into bowls and topped with a bit of the pepper and corn salsa and a wedge of lime to squeeze into the soup.

Wednesday, June 5, 2013

Chick'n Pot Pie


In case you haven't noticed, I'm really into comfort food. Lots of people think vegan food has to be strictly spare and healthy with weird, unfamiliar ingredients and that it has to take forever to make. If this recipe doesn't disprove that, I don't know what will. It has all the classic, familiar elements of pot pie: veggies in a thick, brothy sauce, tender chick'n and, of course, a warm, buttery crust. Comfort food in a bowl. Actually, if you look closely enough, you'll see that the bowl actually says "comfort food," like it was daring me to make this.

This recipe uses Gardein's Chick'n Scallopini, which can be found in the freezer section of most grocery stores (look here for a location near you). I use this chicken substitute for all sorts of things and it's been great in all of them. This pot pie, in particular, has fooled a lot of people into thinking it was chicken. If you're thinking I've heard that before, trust me. It looks, feels and tastes like chicken. It may not seem like much before you cook it, but the results will surprise you.


Ingredients

Crust
2 cups unbleached flour
1 tsp salt
2/3 cup of Earth Balance stick butter (they also make shortening in sticks if you want something a bit flakier)
8 tbsp ice water

Filling
2 tablespoons olive oil 
1 large sweet onion, diced medium
5 celery stalks, diced
2 garlic cloves
6 tbsp unbleached flour
3 cups veggie broth (boxed broth is fine, but I always use Better Than Boullion and make my own broth. It has tons more flavor.)
1 10-12 oz bag of frozen peas and carrots
1 package of Gardein Chick'n Scallopini, defrosted and cubed
salt and pepper to taste


Make the dough: Mix the flour and salt in a bowl. Cut the butter or shortening up into tiny cubes and throw it into the flour. You can use just about anything to cut it in. I use a pastry cutter, but in a pinch you can use two butter knives and cut them up that way. You can also do all this in a food processor and make it really quick. Whatever you do, cut the butter/shortening down to small, pea-sized pieces. Mix in the ice water and stir it up into a ball of dough (start with 6 tablespoons and work your way up). At this point you can roll it out in one big crust or a few small crusts, depending on how you're cooking this. Put it in plastic wrap and keep it in the fridge until it's needed.


Preheat your oven to 420 degrees.

If you're using the Better Than Boullion broth base, go ahead and get the water boiling. The ratio with this stuff is 1 tsp of base for every cup of water. Once the water starts boiling, turn the heat off and mix in the base, put the lid on and set aside.

Make the filling: In a large pot, heat the oil over high heat, then toss in the onion and celery and cook for 3-4 minutes until the onion is soft. Add the garlic and cook another minute or so. Add the flour and stir it around, making sure to coat your veggies in it well. Cook it for a couple of minutes until it starts to brown a little. It should soak up all the liquids and look very dry.


Add the broth a little at a time and stir it around, scraping up the bits on the sides and bottom of the pan and making sure there's no dry flour anywhere. let it come to a boil and then turn it down a bit. Let it simmer for about 5 minutes and it'll thicken right up. 

Once it's thickened, stir in the peas and carrots and cubed chick'n. Toss in a little salt and pepper to taste. Simmer for a couple of minutes to thaw out the veggies. Once things look good, turn off the heat and cover.


Now fill up your baking dish(es). I usually make this in big, bowl-sized ramekins, but you can make it in a square 8 x 8 1/2" baking dish if you're taking it to a potluck or a party. You want to leave at least a quarter inch of space between the top of the filling and the top of the dish.


Take your dough out of the fridge and unwrap it. Using one vertical and one horizontal cut, separate the ball of dough into four equal wedges. Using a rolling pin, roll each wedge out into a disk a little wider than the ramekin. If you go too wide, simply cut the excess off with a knife (I use a ravioli cutter to give a pie-like jagged edge to it).

Put it on top and roll up and crimp the edges so it fits inside the rim of the dish. Using a small, sharp knife, cut out some vent holes for the steam to escape. 


Put the ramekins on a foil-lined baking sheet and bake in the oven until the tops are golden brown, about 20 minutes. Once they're out of the oven, let them sit for about five minutes before serving.

Tuesday, June 4, 2013

Chocolate Strawberry Tart


I'm like a giddy schoolgirl when summer comes around. I know it's not summer yet, but the produce selections are starting to look like it, and that's good enough for me. Fruit-wise, it doesn't get any better for me than strawberries (peaches are a close second). They take me back. We had a strawberry patch in my back yard when I was growing up, and I would root around on my hands and knees to find the biggest, juiciest ones. I apologize in advance if this blog gets a little strawberry-obsessed this summer. I simply can't help it.

Like most of the dishes I make with strawberries, this is simple and pretty unadorned. Strawberries don't really need a lot of help in the flavor department. Nothing's worse than having a gussied-up dessert that hides the true potential of its main star.


Ingredients

Crust:
1 cup unbleached flour
1/4 cup unsweetened cocoa powder
4 tbsp evaporated cane sugar
1/4 tsp salt
6 tbsp Earth Balance vegan butter, cubed and cold
2 tbsp vegan chocolate chips (Ghirardelli brand is usually the only vegan option available at the store)

Filling:
2 lb. strawberries, hulled and thickly sliced
2 tbsp evaporated cane sugar
2 tbps cornstarch
1 tsp lemon juice
2 tsp of vanilla extract, or 2 vanilla beans, sliced and scraped out

Preheat the oven to 400 degrees.

Make the filling: Combine the strawberries, sugar, cornstarch, lemon juice and vanilla in a bowl and stir to combine. Set it aside for 30 minutes so the strawberries will release their juices.

Make the crust: In a food processor, pulse the flour, cocoa powder, sugar and salt about 10 times to combine. I usually put the cubed butter into the freezer for a minute or two while I'm doing this, so it'll be good and firm. Drop the butter into the food processor and pulse another 10 times, until the butter is the size of peas and is combined well into the flour mixture.


Add the water and pulse a few times until the dough is crumbly, but can stick together when you press it.


Put the dough into a tart pan and press it flat, working it into the corners and up the sides. If you've ever made a graham cracker crust, this is pretty much the same thing. You should have plenty to work with.


Place your tart shell on a sheet pan and put it in the oven for 20 minutes to set it up.

Put the chocolate chips into a bowl and melt them in the microwave for 25-30 seconds or so. Once they're hot enough, you should be able to stir them until they're fully melted.


Lightly spread the chocolate over the top of the crust with a pastry brush. You can also just do this with the back of the spoon, but do it carefully as the crust will pull away with your spoon if you do it too fast. Don't worry about going up the sides of the pan, Just a thin layer of chocolate over the bottom of the pan will do.

Give your strawberries a stir. They should be much juicier than they were when you set them aside. Pour the whole thing into the prepared crust and spread it around evenly. Put the tart shell onto the sheet pan and put it back into the oven for another 20 minutes. Once it's done, pull it out and let it cool on a rack.


It'll still be pretty juicy, though the juices should be thicker by now. Once it's cool, you're pretty much ready to go. You can eat it as-is or top it with a sprinkling of cocoa powder or powdered sugar, if you want. Vegan whipped cream would be nice on this as well.